You Searched, I Answer: Do You Need a Flash for Golden Hour Photography?


Often, people stumble upon my blog by typing in a phrase in a search engine. The exact term is not always something I’ve written about, so I’m always tempted to reach out to that person to answer their question. Of course, I have no way of knowing who searched for it; all I have is the search term.

So, I am going to try to start a new blog series called “You Searched, I Answer”.

My last post was about apps that let you track the sun; which can be particularly useful if you want to shoot during the “golden hour”. Someone found my blog by searching for “do u need a flash for the golden hour photos shoots?

Well, it depends on what you are shooting, but I assume you mean portraits. If you do a Google image search for “Golden Hour Portraits”, you’ll see some good examples.

golden hour portraits - Google Search

Google Image Search of “Golden Hour Portraits”

I would begin by using the sun as a rim light. That is, have the sun behind your subject so that the light creates this almost halo effect. It works especially well with women because the light shines through their hair. Now of course, your subject is back-lit, so you need to do one of two things. First, you could use spot metering and meter off of your subject’s cheek. Your camera will expose for the skin and all the highlights will be blown out.

If you want a more balanced image, then you need to provide some fill light. You can use a reflector. Some reflectors come with a gold-colored side. You could try this, but it might be overkill. I would use the white side to throw the orange-colored light back onto the subject.

If you want to use flash, I would gel it with some CTO (color temperature orange) to match the warmth of the natural light. If you fire your flash without a gel it will look blue (remember the flash is daylight balanced). More on gels and white balance here.

I don’t want to use another photographer’s image without permission, so check out these links for some good examples:

Using the Sun as a Rim Light

Using a Reflector to Fill in Shadows

If you do use a reflector, make sure it’s up high so the catchlight on your subject’s eye is at 10 or 2 o’clock.

You searched. I answered.

Apps to Track the Sun


If you’re a photographer and you shoot outdoors then you know how important it is to shoot when the light is just right. For me, I have to time the angle of the sun to shoot the front of houses and pools. So you’ll understand if I’m a little obsessed with tracking the sun.

I’ve previously written about the Sun Seeker app in the “Must Have Apps for Photographers” and the LightTrac app in “A Must Have App for Outdoor Photographers“. I’ve run across two more apps that track the sun, but first I want to review the LightTrac app since it’s what I use the most.

Sreengrab of LightTrac app

I have a couple of complaints about the app. First, it works differently on the iPhone than on the iPad. On the iPad, if you want to search for a location, just hit the “location” button and type in the address. On the iPhone, however, when you type in an address, you first have to save the location before you can see the angle of the sun. My second qualm about the iPhone version is that I often get that “Compass Interference” message. I know that’s an issue with the phone and not the app, but it’s annoying nonetheless. To be fair, I get the interference when using the Sun Seeker app as well.

The next two issues I have are with the maps in the iPad version. I shoot houses, so I need to pinpoint a location. Sometimes, when I enter an address, the marker is on a street or a nearby house. So I usually use Google maps to pinpoint the house and then compare it to the map on LightTrac to make sure I have the right location.

Secondly, when you zoom in all the way, the streets do not follow the map. Let me explain: Imagine the base map as a layer in Photoshop. The streets are “drawn” onto a layer on top of the map. When you zoom in all the way, the street lines do not line up with the street on the map. You can see in the iPad screen grab above how Archfeld Blvd. does not line up with the road on the map. All in all, my complaints are not enough to render the app unusable and I still rely on it for almost every shoot I do.

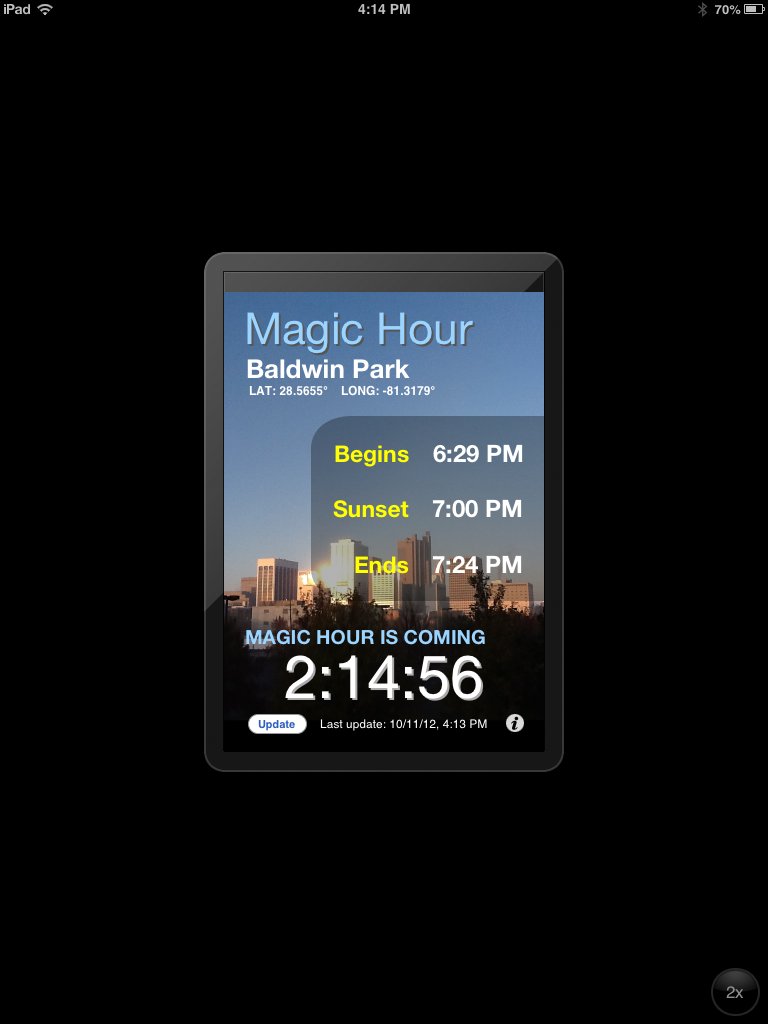
Alright… on to the new apps! The first is called “Magic Hour“. This app simply lets you plan to shoot during that magic hour a half hour before and after sunset when the sky displays those beautiful colors. Photographers usually call this the “golden hour”.

Magic Hour App

As you can see, you enter your location and the app tells you when magic hour begins and ends and even displays a countdown timer. Simple, but useful.

The next app is called “Sol” and I really love the graphical presentation.

Sol App

Your location at present time is placed on top of a sphere. You use your finger to rotate the times of day around your location. So, for example, in the screen grab above, if I were to rotate “Golden Hour” above my location, the clock would tell me what time it would be. You can then transition to the phases of twilight until you get to nighttime and eventually back to the phases of twilight in the morning.

I think this is an excellent way to visualize the phases of twilight, understand there are two times of the day that mirror each other in terms of light and see how long each one lasts. If you want to learn more about shooting in twilight check out my “Twilight Photography” post.

There you have it; four apps to track the sun and figure out the best time of day to shoot. I linked to the apps in the iTunes store, but I believe most of them work on Android devices as well.