Photograph the Super Moon on Saturday


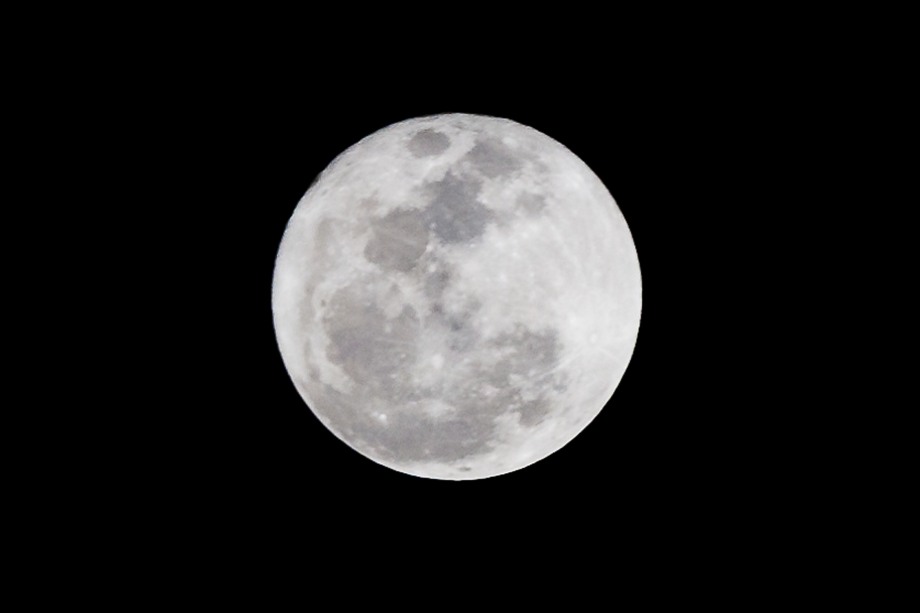
The Super Moon

Super Moon on 3/19/11. (f/11, ISO200, 1/90th @ 200mm)

Get out those telephoto lenses! This Saturday, March 19, the moon will make its closest approach to planet Earth in 18 years and it’ll be full. At just 221,567  miles away, the moon will look 10-15% larger than normal.

While astrologers are predicting earthquakes and tsunamis, there probably isn’t a better time to shoot the moon.  So here are a few tips..

1.) Most people assume that because it’s dark out that they’ll need a slow shutter speed, high ISO, wide aperture or some combination. But remember, you’re shooting a very bright object surrounded by darkness. Your camera’s meter will react to the contrast. So you’ll actually need a narrow aperture (f11 or so), a low ISO (100) and a fast shutter speed.  The narrow aperture will also ensure that you have a wide depth-of-field which will bring out more detail. It’ll take a few tries, but just check your LCD to see if you are overexposing. You may need to use exposure compensation to under-expose by a stop or so.

2.)This goes without saying, but a tripod is a must.  A cable release would also help.

3.) Try different metering modes. In evaluative or matrix metering, your camera will factor any black sky in the frame. If you use spot metering, for instance, and set the focus point on the moon, your camera will expose for the brightness of the moon.

4.) Telephoto lenses work best, obviously, but pay attention to the angle of your lens. The first time I tried to shoot the moon with a 70-200mm lens, I had the camera fairly low, which meant I had to tilt it up. When I looked at my images, I noticed the moon had more of an oblong shape; like someone was squeezing it. So get the tripod nice and high.

5.) Try different white balances to get the color of the moon just the way you like it. Since the moon reflects sunlight, you might try the sunlight setting. But if it’s too warm, try tungsten. Too cool? See what “auto” gives you.

6.) Try shooting the moon around sunset. When the moon is lower on the horizon, it’ll have an orange tint to it.

Good luck and happy shooting.
Pocket Wizard Firmware Bug for Canon Users


Pocket Wizard Mini TT1 and Flex TT5

Pocket Wizard Mini TT1 and Flex TT5

I just discovered a known issue with the Pocket Wizard firmware for Canon. I use the PW Mini and Flex units. The vast majority of the time, I’m just firing one remote speedlite and it works just fine. The problem started when I tried to add a second 580 EXII onto the camera. In case you’re not familiar, here’s the set-up: The Mini sits on the camera’s hotshoe and triggers the Flex which has a flash mounted on it. I then slide another flash onto the mini. The instructions say that the unit on the mini must be set to “master”. I followed all instructions and nada.

So I called tech support and they told me it’s an issue with the latest firmware (which I faithfully update). They sent me some files where I can revert my units to the previous firmware and told me the next update should clear it up. I just reverted the firmware last night and the system works perfectly.

This may not affect you if you never have a speedlite on camera while triggering another off-camera; I rarely do (mind you, I’m not talking about using an on-cam flash to trigger another as with Canon’s wireless controls or Nikon’s CLS). But the product should work as advertised in the moments when, say, you want to use an on-camera flash for fill. Or another instance that I found myself in when I wanted to use high-speed sync. As you may know, HSS or Auto FP for Nikon users, is a great way to shoot at shutter speeds above your camera’s sync speed (around 200th/sec). But doing so comes at the price of power. So having a second flash firing in HSS (even if it is on camera) is a good way to compensate.

If you’re having the same issues, now you know what it is.

Deals on Canon Refurb Cameras and Lenses


Canon Direct Store

If you’re looking to save some money on Canon cameras and lenses, the company is offering a “friends and family” deal of 10% off refurbished items in its online store.

I have no idea what quality “refurbished” would be, but I imagine it would meet Canon’s quality standards; and hey, you can save even more with the discount.

Use code “FAM211“. Offer is good through March 14 or while supplies last and looking through the list, some items are already gone.

Refurbished Powershots

Refurbished DSLRs

Refurbished Lenses and Speedlites

Pictures to Ponder


Images of the 1906 San Francisco Earthquake

I cam across a couple of interesting news items related to photographs. The first, is newly released images of the 1906 earthquake and ensuing fire that destroyed the city of San Francisco. The six images were taken by photography innovator Frederick Ives several months after the April quake. 

Ives took the slides as part of an invention that would allow you to see the images in 3D. The “Kromgram” came out in 1907 and cost about $1000 in today’s dollars. The device never caught on, but the Smithsonian believes  are some of the first true color images of the disaster. Ives is credited with inventing the half-tone process used by newspapers. Another article says,

The process he used to produce colour images, creating separate slides for each primary colour in the light spectrum, required a long exposure and therefore was not conducive to capturing people and objects in motion.

You can see more images in this Telegraph article.

The next news item, I thought had to do with a Lady Gaga song.

Image from Born This Way Blog

It comes from a CNN article about a blog called “Born This Way“. Los Angeles-based DJ Paul V. asked friends to submit childhood pictures that display their gay or lesbian tendencies.  He then compiled the images in the blog and accepts submissions. In fact, the banner on the blog states:

A photo/essay project for gay adults (of all genders) to submit childhood pictures and stories (roughly ages 2 to 12), reflecting memories & early beginnings of their innate LGBTQ selves

I thought this was interesting. Do you think a child’s behavior or even a pose in a photograph can or will determine if that child is gay or will become a gay adult? If a boy puts on his mother’s shoes or a tom-boy dresses in boy’s clothes…does that mean they might be gay? I’ll leave this open to your comments…

Free Photography Education


I wrote a blog last May about Photography Education and Inspiration. In it, I point readers to web sites where they learn about photography. Another great resource is Webinars and Webcasts. Top industry professionals and merchants often give hour-long classes on various topics. Often, if you can’t watch it live, you can go back and watch a recording. The following is a list of resources in no particular order.

1.) Creative Live. This Seattle-based group offers workshops that span 8-hours over three days (usually Fri-Sun) on topics such as; wedding photography, studio lighting and children’s photography. They get top-notch pros like Jasmine Star and Zack Arias to teach the workshop live. You can register and watch it for free or pre-purchase the entire show before the workshop ends at a discounted price. Once the workshop is over, you’ll have to pay more for the download. There’s a workshop starting tomorrow with Vincent LaForet for photographers looking to move into shooting video with their DSLRs.

2.)Peachpit Photo Club. The publisher of many photography books also hosts live webcasts with the likes of: Canon Speedliter, Syl Area; wedding photographer David Ziser and Photoshop Gurus, Scott Kelby and Matt Kloskowski. You can watch past webcasts on the site or register for upcoming shows.

3.)OnOne University. OnOne makes Photoshop plug-ins so, yes, their webinars are a little biased toward their products. But you can still learn from top photographers and see their editing workflows. Check out this link for a calendar of upcoming classes.

4.) X-Rite Photo. This is another merchant that is pushing its product while spreading some knowledge. There’s a webinar scheduled for today, in fact, about getting started in Lightroom.

5.) Friday Photo School. Every Friday there’s a new class on topics such as off-camera flash, posing and portrait lighting. They do offer the occasional free episode and you can download them from the archive. Most of the classes, however, cost $10 to watch or $15 to download later. Be sure to check out the library for the free ones.

In past blogs, I’ve already mentioned Kelby TV, which is the central location for shows such as: Lightroom Killer Tips, Photoshop User TV, Ask Dave and D-Town TV. On Monday, Scott Kelby is launching a new live show at 12:30 EST called “The Grid”.  It’ll be available to watch later if you can’t make the live broadcast.

So there you have it. It’s like going to photography school without the tuition! Yes, it requires a time commitment, but if you want to be a better photographer, what better way to do it than to spend some time with the pros offering a free education?

Inside the Nikon D7000 and News on the D5100


From the good folks who take apart DSLRs, comes this video of a look inside a Nikon D7000 . (Don’t bother with the audio, it’s not in English).

It really reminded me of this:

In other Nikon news, Nikon Rumors is reporting that the D5100 release is just weeks away. It could have 11 auto-focus points and possibly a 16.2 MP sensor. Details here and here.

Technique Tuesday: Bedroom


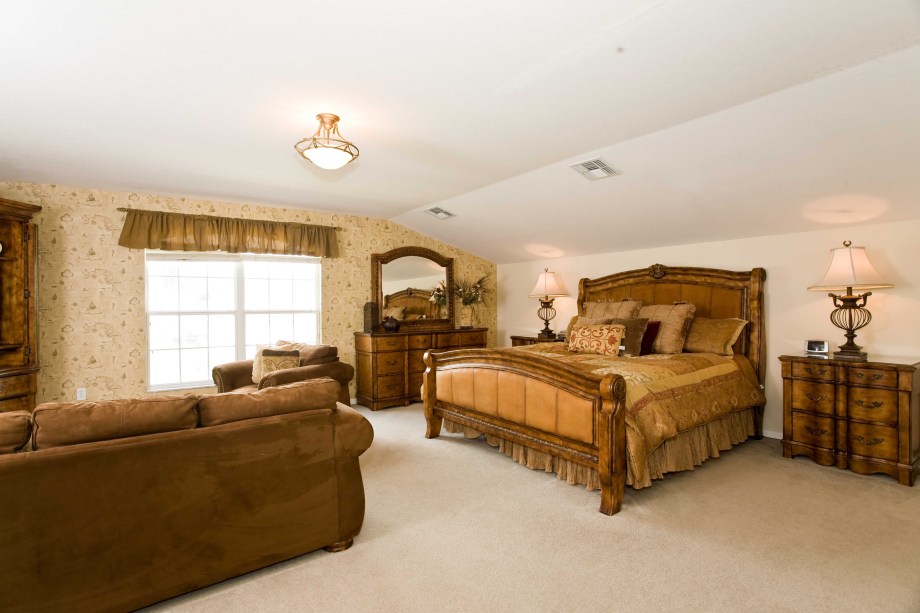
Ok, I’m calling this “Technique Tuesday” but I can’t promise I’ll do this every week. But today is Tuesday and this is about a technique I use almost everyday; hence the title. Brilliant, no?

A Master Bedroom

f/10, 1/3 second, ISO 200

The image above is pretty much the RAW image straight out of camera. It’s shot with a Canon 5D and a 580EXII on camera with a diffuser and bounced off the ceiling. If I remember correctly, I believe I have the flash set to TTL and boosted it by +2.

I then set up an Alien Bees 1600 strobe to camera left fired through an umbrella and set to 1/8 power for the image below.

Master Bedroom

f/8, 1/8 second, ISO 200

You can see right away what adding an extra off-camera light adds to the image. (Note: the image above was tweaked slightly in Adobe Camera Raw.) I then took another exposure for the window:

Master Bedroom

f/10, 1/180th, ISO200

I also tweaked the image above to bring out the blue in the sky a little. I then placed that image on top of the first one in Photoshop and masked out the window for the final image. I also got rid of that bothersome sensor dust in the ceiling.

Master Bedroom

That’s it. No fancy HDR tricks. Let me know what you think or if you have any questions.