Why Realtors Should Use Professional Photography


I got a call from a prospective client asking me to take pictures of their home which they were putting on the market. The caller said she wasn’t happy with the photos the realtor took. I chuckled to myself because I know all too well the horrible pictures on the Multiple Listing Service (MLS) sites. When I got to the home, the husband told me how the realtor took a few snapshots with a point and shoot and he knew right away the pictures would just not do. Judge for yourself:

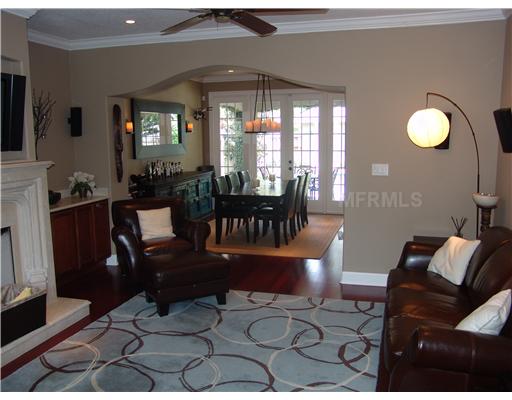
Living Room Photo on MLS site

Before: Dark and crowded

Living Room

After: Bright and open

The homeowner told me how he hired a professional photographer to sell a previous home and how quickly the home ended up selling. So why don’t more realtors use professional photographers? Maybe they think it’s too expensive. But as I pointed out in a previous blog; depending on the price of the home, the cost could be a fraction of the commission. The payoff is selling the home faster which means not having to lower the price as the listing lingers on the market. Maybe they think mediocre pictures will do just fine. Or maybe their mindset is stuck in the “this-is-the-way-we’ve-always-done-it”.

Kitchen on MLS Site

Before: Those skewed verticals drive me crazy!

Kitchen

After: Ahh. That’s better.

Ten years ago, if you wanted to buy a house, you had to do some footwork. It required going with your realtor from house to house. Today it’s all done on-line. So it’s even more important to have good pictures to attract more visitors to the property.

Bedroom on MLS Site

Before

Master Bedroom

After

[UPDATE 8/28/12: Check out this article from the Wall Street Journal that states home listings with professional photos attract 61% more views: “Get a Picture Perfect Home Sale”]

Consider this quote from a 2010 Wall Street Journal article (it was still getting comments as of June 2012) that cited a study which found homes with professional photography gained higher asking prices.

At the closing table, listings with nicer photos gain anywhere between $934 and $116,076–as measured by the difference between asking and final price–over listings using photos from point-and-click cameras.

Here is the study the WSJ cited with nice charts and graphs: A Picture is Worth a Thousand Dollars.

Bedroom on MLS site

Before

Bedroom

After

I could site several more articles and studies that show homebuyers begin the process online, even on their phones and tablets; and that listings with good pictures attract more views and sell at higher prices. It’s time to end the status quo. If you are selling your home, you should demand professional photography. If you are in the business of selling homes you should add professional photography to your arsenal of online marketing. At the very least, it would differentiate you from all the other realtors who think they can do it themselves and settle for far less.
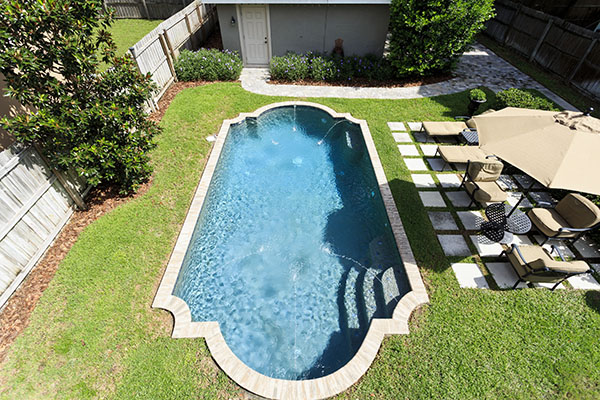
Pool on MLS

Before

Pool

After

Technique Tutorial: Color Correcting for Mixed Light


I was going to write a post griping about the lack of color correction gels for Paul Buff strobes (Alien Bees, Einsteins). Instead, I figured I’d show you how I came up with my own solution. Take a look at this picture:

Dining Room

The image was taken on “auto” white balance with a strobe fired through an umbrella. Take a close look at the colors. You’ll see some orange mixed with white. The orange light is the warm light coming from the incandescent bulbs. The “white” light is actually “blue” daylight coming from this open sliding glass door:

Living Room

The strobe matches the daylight color temperature and the camera reads it as white. In order to balance the colors, I need to match the light sources. The first thing I do is to close the sliding glass door and the curtains. This filters out any blue daylight leaving me with a single light source. My strobes, however, are still balanced for daylight. I can put a gel over my speedlight which I’ve blogged about here and here. But that won’t give me enough power to properly light the room. My Einstein is powerful enough, but as I mentioned above, the company doesn’t make color correction gels. They do have gels, just not color correcting ones.

(If you’re new to color correcting flash and you didn’t read the previous blogs I linked to above; here’s the primer: Light from a flash roughly matches daylight which is around 5600 degrees Kelvin. Incandescent lamps are warmer at around 2800-to-3600 degrees Kelvin. Putting an orange gel (Color Temperature Orange) on a flash turns it into an incandescent lamp.)

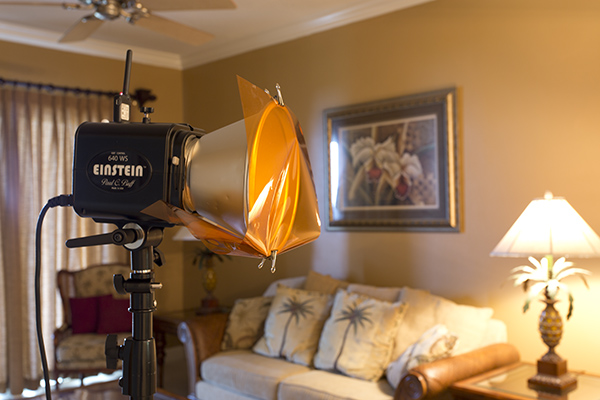
So I had to buy my own gels that would fit the Einstein. I went with a pack of LEE daylight-to-tungsten filters. The pack includes a range from a full cut of CTO down to 1/8. They are big enough to cover the 7-inch reflector but there’s no way to attach the gel to it. I could buy clips, but I would pay more in shipping than the things cost. So I just use two small binder clips.

Einstein Strobe with gel

Here you see the set-up (notice the curtains are closed). It may not be elegant, but it works. If I want to use an umbrella, I would have to cut a hole in the gel. Usually, I’m close enough where I can hold it in front of the strobe or I just use the timer on the camera so I can run and hold the umbrella.

Now that my strobes (I’m also using a gelled speedlight) match the light source in the room, I just set my camera’s white balance to tungsten and take the shot.

Dining Room Color Corrected

If you’ll notice, this image just seems more balanced. All the light in the room is roughly the same color temperature. One of the biggest challenges I face shooting interiors is shooting in mixed light. Having the right tools can make all the difference.